Thursday, July 22, 2010

cord basket


Finally I got around to trying the cord basket. It worked, but not quite how I thought it would. A little.... floppier?!

Here are my instructions:

1. Start stitching the cord into a flat coil (I used thread, but yarn would probably work too)

2. Continue stitching the coil until you are satisfied with it (make sure it will be proportionate with the rest of the basket, this will be the bottom of it)

3. Then, start coiling the cord onto the sides of your basket, and stitch from top to bottom.

4. Continue until you run out of cord!


Finished basket


Sunday, July 11, 2010

interesting knitting device

Recently I found a neat website, This and That. On it was basic instructions of how to make one of these. I'm not exactly sure how to describe it other than it creates a long knitted cord (see bottom of post). To make one, you need:

~Toilet paper tube
~Four Popsicle sticks
~A couple rubber bands
~Yarn to knit with

Attach the Popsicle sticks a regular intervals around the tube with the rubber bands them to hold them secure (pretty simple! ;D).

To Knit :

Drop the loose end of the yarn into the tube so it falls all the way down,


then twist the yarn around the Popsicle sticks as shown:


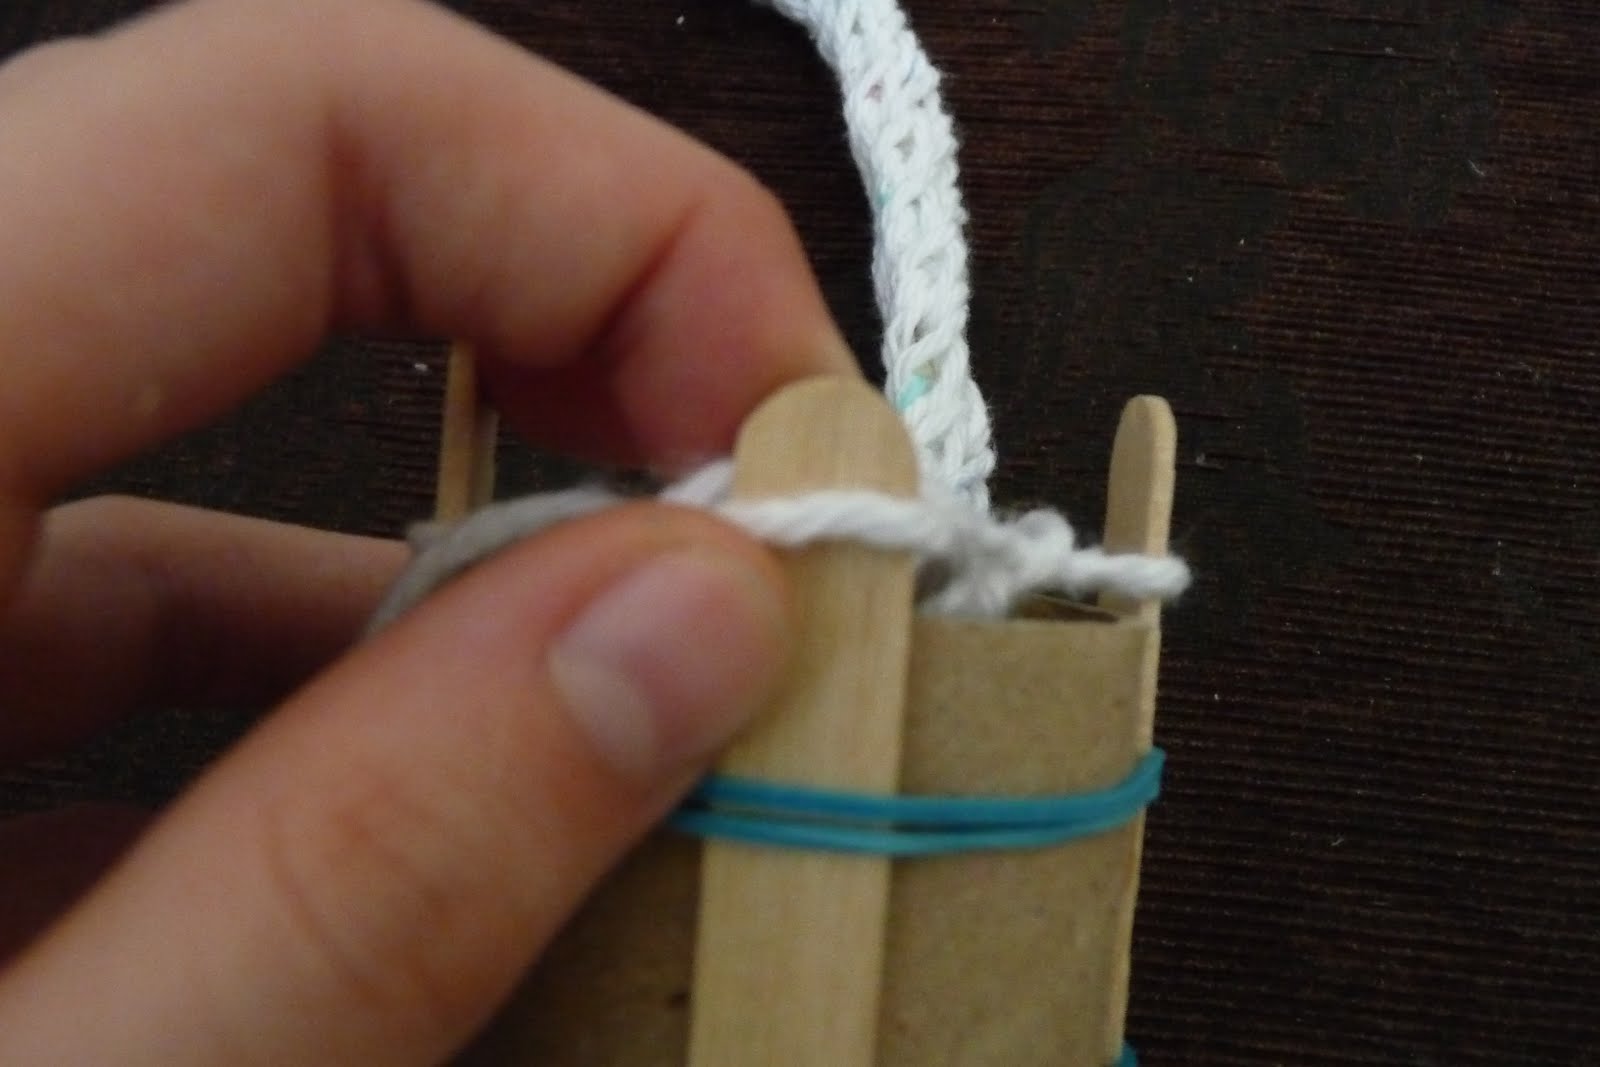
Next, using the yarn that is attached to the ball,(#1) pull the strand of yarn up against the outside of the next Popsicle stick, making sure to keep it above strand #2


Holding yarn #1 with one hand, take loop #2,

and pull it all the way over #1 and the Popsicle stick.


Finished stitch:

Repeat this, rotating the tube counter clockwise to the next stick each time.
Very quickly, you will find yourself with yards of this cord coming out the bottom of the tube.
What to do with it? :S I haven't quite figured out, but perhaps a basket...
If it works I will blog about it, sooner or later. (I meant to do my blogging today!)

Finished Cord

Wednesday, June 2, 2010

origami magic rose-cube

This cube is really neat, and once you unfold it, it is hard to put down. Here is the link to the pdf instructions:
http://www.mediafire.com/?3t0tnwzjytu
It was fairly simple, though a few steps took me awhile to understand. After a little work I got it to actually fold out into a rose! Here are some pictures:


The cube...

To unfold it into a rose you grab the opposite sides of one red square and gently squeeze it together. Repeat with the other red sides.


Then do the same thing with the green squares...


...and voila! A beautiful rose!
(The white in the petals is because I used two toned origami paper)

Opened rose

To close the rose, gently smooth all six squares back to their normal position.


Wednesday, May 26, 2010

origami 4 kindergarten

The other day my mom taught kindergarten for a day (the real teacher was busy). She invited me to show the kids some origami things I have made and to teach them a simple project. So Monday afternoon I came up to school. I showed them an origami caterpillar, a pecking crow, my origami firework (see older posts) and a few other things. Then I taught them how to fold a paper dog face. They really enjoyed it!

Showing them the firework...


The little drinking bird...

Leading them through the steps of folding...

...and their finished puppies!
I think they really loved cutting and folding, but even more so, the final result!


Friday, May 21, 2010

origami firework


Recently I have been getting into origami. I especially enjoy the module origami. I have found several sites that have free diagrams. One of them,

http://www.spitenet.com/origami/yami.shtml

had a really neat origami module that was fairly simple, called a "Firework". I tried it and (for once!) came out with something that actually worked!
Here it is:

To make it change shapes you grab two opposite corners and gently turn the firework inside out.

The firework changing shapes...


...and back to where it started.